
Something about a perfectly bubbly sourdough starter is satisfying. Just two ingredients,  water and flour, leads to bubbles, increase of substance, and life. Then when added to a few more ingredients, it aids in the creation of a satisfying loaf of bread. Gluten-free sourdough bread is even more satisfying in that it’s not kneaded and only requires one rising. It doesn’t have to be looked after much, either. One has only to mix the ingredients and set the dough to rise. During the four or more hours the dough is rising, one has time for work, cleaning, running errands, and even a long run. Baking a nice loaf of gluten-free bread is is actually very easy.
As easy as baking gluten-free sourdough may be, just one loaf of gluten-free bread requires much more sourdough starter than a gluten-containing sourdough bread. The need for a large amount of starter means that you need to have at least two jars of active sourdough starter in order to begin baking your bread (see my post on starting and maintaining a gluten-free sourdough starter). Once your starter is lively and rearing to go, you are reading to bake a perfectly beautiful and delicious loaf of gluten-free sourdough bread, with a texture and flavor very close to that of gluten-containing sourdough bread.
 I omit the use of zanthan and guar gums, as well as psyllium husk, in my recipes. Instead, I use 10% to 15% of either resistant starches (banana flour, plantain flour, tigernut flour, carob flour) or fibrous flour (coconut). As I’ve noted before, these flours are whole flours; they are simply ground versions of the whole plants from which they come, and they do the same work as the gums or psyllium husk. At times, I use a gel made from chia seeds or ground flax as a gluten replacement; other times I use one of the above varieties of gluten-free flours. What I used to replace gums depends upon what I have in my kitchen at the time I’m baking. Each works as well as the other to hold the bread together and give the bread that pleasing soft, chewy texture.
Some other ingredients are helpful in the successful making of a gluten-free sourdough (and yeast) bread. These ingredients are called dough enhancers, and are used by many people who bake gluten-containing bread to aid in the rising of the yeast, as well as to aid the texture and the preservation of the bread. The site Bread Machine Digest has an extensive list of dough enhancing ingredients. This website page also lists proper quantities of each dough enhancer, as well as explains the property way to use them. Most, but not all, of the ingredients listed are gluten-free. I include the dough enhancers I use in the recipe below, but I’ve successfully used several of the dough enhancers listed on the Bread Machine Digest website. When I use dough enhancers in my sourdough and yeast breads, my loaves end up with textures very much like those of sourdough and yeast gluten-containing breads. Phillip can tell the difference between breads I bake without dough enhancers (usually because I’ve simply forgotten to include them) and those that contain dough enhancing ingredients.
Please weigh your ingredients. Inexpensive digital scales are available everywhere, from your local grocery store to national chain discount stores to Amazon.com. Weighing ingredients, liquid as well as dry, leads to consistently successful results when you are baking gluten-free as well as gluten-containing foods. Too many variables enter into the amount of flour and liquid you end up using when you measure by volume rather than by weight.
I, like many people, use a Dutch oven to bake my sourdough bread; the Dutch oven creates and maintains steam while the bread is baking. This steam helps to create a shiny, nicely browned crust. A Dutch oven, however, is not necessary for baking a successful loaf of gluten-free sourdough bread. People who want to bake crusty, chewy loaves of gluten-free sourdough, but who lack a Dutch oven, have plenty of other bakeware options. Check out this blog page on the website The Kitchn, for ideas. Be sure to read the comments following the blog post for more bread bakeware ideas from The Kitchn readers. No matter which type of casserole or pot in which you decide to bake your bread, line it with parchment paper. Your bread will be certain to fall nicely out of the pan after it’s baked, if its baked on parchment paper.

I just mold the parchment paper in the Dutch oven while pressing it; the paper always stays put really well.
Be sure to use an oven thermometer to check the temperature of your oven, and adjust the temperature as necessary to make sure your oven is neither too hot nor too cold for baking your bread. Ovens are rarely true to the temperature at which they are set to cook. Having noted this fact, I have to brag on my twenty-one oven in my San Antonio kitchen, which is perfectly calibrated. It has also never malfunctioned in any way since I bought it in 1995, but the inside glass panel is cracked. Phillip wants to replace it (he thinks it’s unattractive) but I refuse to let go of my old oven friend with the perfect pitch. On the other hand, we have a two year old, much fancier, oven (the same make as the my faithful oven in SATX) in our Austin kitchen, and it’s consistently twenty-five degrees too hot. I have an oven thermometer hanging in each oven, and I know now that I have to set my Austin oven twenty-five degrees lower than the temperature I want to use for whatever I’m baking. Baking your bread (or anything) at the correct temperature places the odds of creating a successful loaf of gluten-free bread in your favor.
An instant read thermometer is also an essential tool for baking a successful loaf of bread, gluten-free as well as gluten-containing. Loaves of bread often look done on the outside, while remaining as yet uncooked on the inside. The way to be positive a loaf of bread is completely baked inside and out is to use an instant read thermometer. For enriched breads (those that contain milk and eggs), the internal temperature needs to be at least 180°. For breads without eggs, such as sourdough and slow fermented breads, the internal temperature needs to reach 210°. I bought my instant read and oven thermometers at the grocery store, for about five dollars, each.

2.8 Concinaware Dutch Oven
A note about baking sourdough bread: I’ve baked bread by preheating my Dutch oven thirty minutes in the oven before moving my dough from a parchment lined bowl (using the parchment paper to move it) to the pot for baking, as some bread-bakers swear is necessary. I’ve also allowed my dough to rise in the parchment-lined pot, placing the pot with the dough in it in a pre-heated oven. Either way, the bread bakes the same way. I see no advantage to preheating the pot in the oven before placing the dough in it, for gluten-free breads anyway. Gluten-free dough is more fragile than gluten-containing dough, and ruining its fragile rise is way too easy. Additionally, I ruined a Dutch oven by pre-heating it empty. I found out, too late (from the Le Creuset website) that preheating an empty Dutch oven in the oven ruins its finish. In fact, the Dutch oven bread recipe on the Le Creuset website explicitly states to allow the second rise IN the Dutch oven, and place it in a preheated oven when it’s ready to bake. I now use a parchment paper-lined 2.8 Cocinaware Dutch oven (sold by HEB). It’s a nice Dutch oven, and it’s inexpensive; if I accidentally ruin it, I won’t cry. Whichever container you use to bake you bread, be sure all the parts (handles, etc) are oven-safe.

Gluten-free sourdough bread baked after 4 – 6 hours of rising is about always about 1/4 taller than sourdough bread left to rise longer than six hours.
One element of sourdough (or slow-fermented) bread baking is the long rise time. Truthfully, shorter rise times for gluten-free slow-fermted breads (sourdough as well as those made by the no-knead method popularized by Jim Lahey) lead to a more successful loaf of bread. I’ve tried both ways: four to six hour rises vs twelve to fourteen hour rises. The shorter rise times actually lead to taller loaves. From what I’ve observed, through my non-scientific eyes, the reason the shorter rise time works better is that gluten-free dough reaches a point at which it rises as high as possible, and after that point passes, the rise turns into a fall. I’ve checked the dough at various stages of rising through the various length of times I’ve allowed it to rise, and I can actually tell when the dough starts to reduce in size after having reached its peak. That time happens after about six hours, but is more obvious a couple hours later. I find that allowing six hours rise at the most leads to the best possible rise of slow-fermented gluten-free bread. The loaves of bread left to rise long after six hours are sometimes a little wider than those allowed to rise for fewer hours, but never as tall or taller. Moreover, the tops of the shorter risen breads are always more attractive than the tops of the longer sourdough breads, with the dough cutter slits still visible in them.

This is gluten-free sourdough bread after a five hour rise.

Gluten-free dough allowed to rise thirteen hours.
Slow-fermenting gluten-containing breads for hours at a time works because the process impacts the gluten in the dough. It makes the gluten easier to digest, but it also encourages its development. We gluten-free bread bakers have no gluten to worry about; the slow fermenting is all about flavor. A gluten-free bread allowed to rise slowly does have a chewy texture and rather tangy flavor missing from gluten-free breads made with commercial yeast, so it’s definitely worth the hours that go into creating and baking it.
After much time spent experimenting and perfecting the making of gluten-free sourdough bread (which is one of the reasons I feel the need to run so many miles every other week – I have to eat what I bake!), I have developed a recipe from a gluten-containing recipe that works nearly every time. It’s a smaller loaf, approximately 2 lbs. Smaller loaves seem to rise more successfully. Additionally, although gluten-free sourdough bread will never have the airy, open crumb (large holes in the bread’s interior) that gluten-containing sourdough bread has, smaller loaves of gluten-free sourdough bread has a less tight crumb (dense texture) than larger loaves of gluten-free sourdough bread. Furthermore, people eat the small loaves faster, which means it doesn’t have to be frozen in order to be preserved.

Dough for gluten-free sourdough bread should be thicker than cake batter, but not thick enough to knead.

After scraping the bread dough into the parchment paper-lined Dutch oven, use wet fingertips to smooth the top of the dough.

Use a knife or a dough cutter to make slashes in the sourdough boule.

Place a shower cap over the top of the Dutch oven, and place in a warm area to rise for 4-6 hours.

Gluten-free sourdough bread dough, ready to bake after five hours of rising.
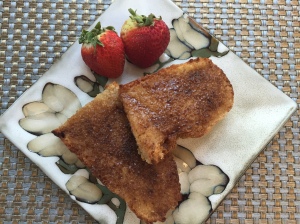
Now you can enjoy such wonderfully bread-y treats such as cinnamon toast that tastes, feels, and behaves as the wheat bread you used to eat before your Celiac (or gluten-sensitivity) diagnosis!
Things you will need:
Oven thermometer
Instant read thermometer
2.8 qt Dutch oven with lid
Gluten-free sourdough starter
Parchment paper
Shower cap
Spritzer bottle of water
Gluten-Free Sourdough Bread
300 g (11 oz) Gluten-free sourdough starter
80 g (3 oz) Arrowroot starch
120 g (4.25 oz) Authentic Foods superfine sorghum flour
120 g (4.25 oz) Authentic Foods superfine brown rice flour
1/8 Ascorbic acid
2.5 tbls dry milk powder
2 tbls sugar
1 tsp Salt
5 – 6 oz Purified (un-chlorinated) water
-Prepare the 2.8 qt Dutch oven by pressing parchment paper to fit inside the pot.
-In a bowl, mix all the dry ingredients together.
-In a food processor or with a stand mixer, blend the dry ingredients and the sourdough starter together. The mixture will be crumbly.
-Add six oz of water to the mixture; blend well. The mixture should be too wet to knead, but not as wet as pancake dough or cake batter. If the mixture is too dry, add more water, one tablespoon at a time, until the dough reaches the correct texture.
-Scrape the dough into the prepared paper-lined Dutch oven.
-With damp finger tips, smooth the surface of the dough.
-Using a dough cutter or knife, make two or three slashes across the top of the dough, to allow the center of the boule to cook more evenly.
-Spray the top of the bread with water, to help create a nice, chewy crust.
-Cover the pot with the shower cap, and set in a warm place to rise.
-Allow to rise 4 – 6 hours
-When the dough is ready to bake, remove the shower cap, spritz the dough with water (to help create steam while the bread bakes) and place the lid on the pot.
-Place the dutch oven with the dough in it in a cool oven; set the oven
temperature at 425 and allow the Dutch oven to heat up slowly as the oven
heats (this process helps to protect the Dutch oven from the damage caused by
heating it too quickly).
-Bake the bread for 45 minutes.
-After 45 minutes, remove the lid, check the internal temperature with an instant read to see how closely the bread is to being done.
-Place the Dutch oven back in the oven, without the lid, so that the top of the bread can brown.
-Using the instant read thermometer, check the internal temperature of the bread after 10 minutes. If the temperature is 205° – 210°, remove the bread from the oven. If the temperature is under 200°, return the bread to the oven and check the temperature in ten minute increments until the center reaches the correct temperature.
-Remove the pot from the oven. Cool the bread in the pot for about fifteen minutes before moving it from the pot to a cooling rack.
-Cool the bread for at least two hours before slicing, to preserve its interior texture (RESIST THE TEMPTATION TO EAT IT WARM – the texture will be gummy if you slice it before its cool).
-Wrap the bread in parchment paper and store on the counter. Freeze whatever is left of the bread after three days (Storing it in the refrigerator will cause the bread to dry out.)
